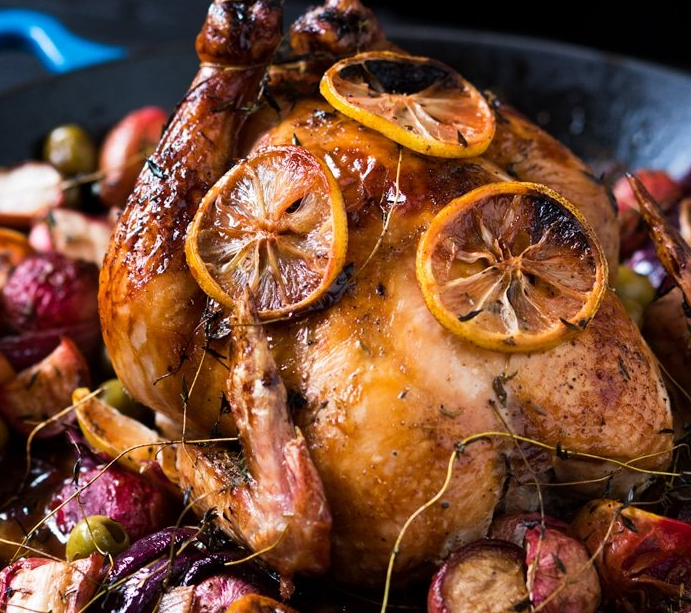
Expect this paleo and keto roast chicken with lemon and thyme to be ridiculously juicy, bursting with flavor, and very (very!) easy to whip up!
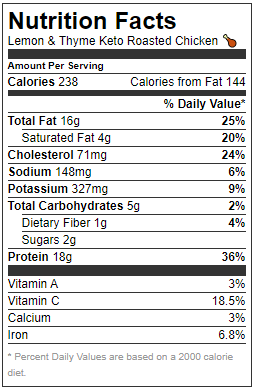
PREP TIME: 15 MINUTES COOK TIME: 1 HOUR 30 MINUTES TOTAL TIME: 1 HOUR 45 MINUTES SERVINGS: 8 CALORIES: 238 KCAL
INGREDIENTS
- 1 whole chicken skin on, 5 to 6 pounds
- kosher salt
- black pepper freshly ground
- 1 medium onionquartered
- 20 springs thyme
- 2 tablespoons extra virgin olive oil
- 8-10 cloves garlicthinly sliced lengthwise
- 4 medium shallotspeeled and quartered lengthwise**
- 2 bunches medium radishes trimmed and halved
- 1/4 cup olivesoptional
- 1 lemon thinly sliced crosswise
- 2/3 cup dry white wine or chicken broth
- 2 tea spoons blackstrap molasses or sweetener of choice*
INSTRUCTIONS
- Preheat oven to 425°F/220°C.
- Rinse the chicken inside out and pat dry. If need be, remove any leftover pin feathers. Liberally season with salt and freshly ground black pepper the inside of the chicken. Stuff the cavity with the quartered onion, part of the thyme, and some garlic. Tie the legs together with a kitchen string.
- Pour olive oil onto roasting tray. Spread around the bottom of the pan remaining garlic, shallots, radishes and olives. Place prepared chicken on top and add lemon slices and remaining thyme springs.
- Mix together thoroughly white wine (or broth) and molasses (or sweetener). Pour over
the chicken and veggies. Season the chicken on the outside liberally with salt and freshly ground black pepper.
- Roast for 1 1/2 hours, or until the juices run clear between the leg and thigh. A thermometer inserted near the bone should read at least 165°F (75°C).
Cover with aluminum foil, and allow the chicken to rest for 20 minutes prior to slicing and serving.
- Oh, and I’m also rather fond of serving the chicken with the caramelized lemon slices. After the nice and long roasting time, they take on a killer flavor and caramelize to perfection; becoming completely edible. But if they’re not your thing, simply remove after roasting.